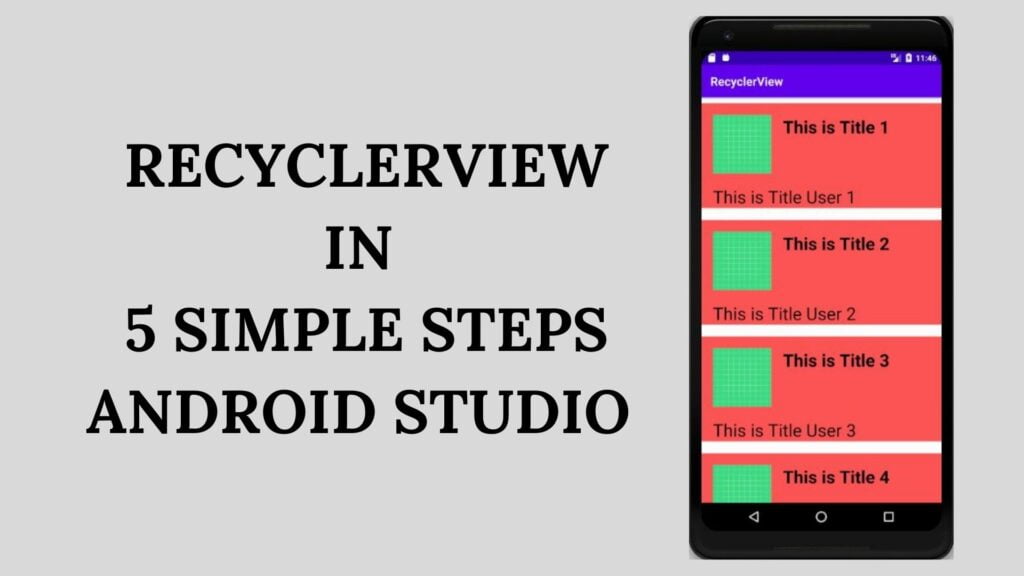
Today we are going to learn Android RecyclerView in 5 Simple Steps using Android Studio 3.6 latest version.
If you are working with recyclerview for the android project, then here I have explained with a video tutorial that will help you to understand how to use Recycler View in 5 simple steps.
So let’s get started step by step and create a new project in Android Studio.
STEP 1: Create Android RecyclerView and Set Layout Manager
First of all, we will create a recyclerview in our layout file (activity_main.xml) and after that, we will set layout manager on it
<?xml version="1.0" encoding="utf-8"?>

<androidx.constraintlayout.widget.ConstraintLayout
    xmlns:android="http://schemas.android.com/apk/res/android"
    xmlns:app="http://schemas.android.com/apk/res-auto"
    xmlns:tools="http://schemas.android.com/tools"
    android:layout_width="match_parent"
    android:layout_height="match_parent"
    tools:context=".MainActivity">


    <androidx.recyclerview.widget.RecyclerView
        android:id="@+id/recyclerView"
        android:layout_width="0dp"
        android:layout_height="0dp"
        app:layout_constraintBottom_toBottomOf="parent"
        app:layout_constraintEnd_toEndOf="parent"
        app:layout_constraintStart_toStartOf="parent"
        app:layout_constraintTop_toTopOf="parent" />

</androidx.constraintlayout.widget.ConstraintLayout>
Thereafter, we will access the recycler view from our layout file and then set LayoutManager on the recycler view in our main activity.
public class MainActivity extends AppCompatActivity {

    private RecyclerView recyclerView;

    @Override
    protected void onCreate(Bundle savedInstanceState) {
        super.onCreate(savedInstanceState);
        setContentView(R.layout.activity_main);

        recyclerView = findViewById(R.id.recyclerView);

        LinearLayoutManager layoutManager = new LinearLayoutManager(this);
        layoutManager.setOrientation(LinearLayoutManager.VERTICAL);
        recyclerView.setLayoutManager(layoutManager);
    }
}
STEP 2: Create Item Layout
Here we will create a new item layout that contains our data so that we can use it in our recycler view.
To create an item layout, go to the resource (res) directory in our android project, then right-click on the layout folder >> new >> layout resource file.
Give the name to our layout file, in my case I gave item_layout. You can give whatever you like.
To simplify, I have used three items in this layout file that is, image, title, and body. You can use more items as per your project requirement and design them as per your need.
<?xml version="1.0" encoding="utf-8"?>

<androidx.constraintlayout.widget.ConstraintLayout
    xmlns:android="http://schemas.android.com/apk/res/android"
    xmlns:app="http://schemas.android.com/apk/res-auto"
    xmlns:tools="http://schemas.android.com/tools"
    android:layout_width="match_parent"
    android:layout_height="wrap_content"
    android:layout_marginTop="10dp"
    android:layout_marginBottom="10dp"
    android:background="#FF5555">

    <ImageView
        android:id="@+id/imageView"
        android:layout_width="100dp"
        android:layout_height="100dp"
        android:layout_marginStart="20dp"
        android:layout_marginTop="20dp"
        app:layout_constraintStart_toStartOf="parent"
        app:layout_constraintTop_toTopOf="parent"
        app:srcCompat="@drawable/ic_launcher_background" />

    <TextView
        android:id="@+id/textTitle"
        android:layout_width="wrap_content"
        android:layout_height="wrap_content"
        android:layout_marginStart="20dp"
        android:layout_marginTop="20dp"
        android:text="TextView"
        android:textColor="#000000"
        android:textSize="30sp"
        android:textStyle="bold"
        app:layout_constraintStart_toEndOf="@+id/imageView"
        app:layout_constraintTop_toTopOf="parent" />

    <TextView
        android:id="@+id/textBody"
        android:layout_width="0dp"
        android:layout_height="wrap_content"
        android:layout_marginStart="20dp"
        android:layout_marginTop="20dp"
        android:layout_marginEnd="20dp"
        android:text="TextView"
        android:textColor="#000000"
        android:textSize="30sp"
        app:layout_constraintBottom_toBottomOf="parent"
        app:layout_constraintEnd_toEndOf="parent"
        app:layout_constraintStart_toStartOf="parent"
        app:layout_constraintTop_toBottomOf="@+id/imageView" />

</androidx.constraintlayout.widget.ConstraintLayout>
STEP 3: Create Model Class
Now we need to set data in our item layout, for that we need to store this data somewhere. So to store that data, we will create a new Model class.
Go to the Java directory and in the first directory, right-click>> new >> Java class, and provide a name to your java class (ModelClass).
In this class, we will create variables which contain in our item layout, so we have only used three items, so we will create three variables.
public class ModelClass {

    private int imageIcon;
    String title;
    String body;

    public ModelClass(int imageIcon, String title, String body) {
        this.imageIcon = imageIcon;
        this.title = title;
        this.body = body;
    }

    public int getImageIcon() {
        return imageIcon;
    }

    public String getTitle() {
        return title;
    }

    public String getBody() {
        return body;
    }
}
STEP 4: Create an Adapter Class
This is the main part so we need to focus more. Basically, the Adapter class is used to get data from our ModelClass and set it in our item layout. In the Adapter class we have 2 substeps:
- Create ViewHodler Class
- Implement Methods
So first, we will create an Adapter class, so once again in our Java directory, right-click on the first directory >> new >> Java class, and provide a name to your java class (Adapter).
Once the adapter class is created, we need to customize it and add custom features. So we will extend the default recycler view adapter which is already predefined.
public class Adapter extends RecyclerView.Adapter<Adapter.Viewholder> {

}
Create ViewHodler Class
public class Adapter extends RecyclerView.Adapter<Adapter.Viewholder> {

class Viewholder extends RecyclerView.ViewHolder {

        private ImageView imageView;
        private TextView title;
        private TextView body;

        public Viewholder(@NonNull View itemView) {
            super(itemView);

            imageView = itemView.findViewById(R.id.imageView);
            title = itemView.findViewById(R.id.textTitle);
            body = itemView.findViewById(R.id.textBody);
        }

        private void setData(int imageResource, String titleText, String bodyText){

            imageView.setImageResource(imageResource);
            title.setText(titleText);
            body.setText(bodyText);

        }
}
Implement Methods
public class Adapter extends RecyclerView.Adapter<Adapter.Viewholder> {

    private List<ModelClass> modelClassList;

    public Adapter(List<ModelClass> modelClassList) {
        this.modelClassList = modelClassList;
    }

    @NonNull
    @Override
    public Viewholder onCreateViewHolder(@NonNull ViewGroup viewGroup, int viewType) {

        View view = LayoutInflater.from(viewGroup.getContext()).inflate(R.layout.item_layout, viewGroup, false);
        return new Viewholder(view);
    }

    @Override
    public void onBindViewHolder(@NonNull Viewholder viewholder, int position) {

        int recource = modelClassList.get(position).getImageIcon();
        String title = modelClassList.get(position).getTitle();
        String body = modelClassList.get(position).getBody();
        viewholder.setData(recource, title, body);

    }

    @Override
    public int getItemCount() {
        return modelClassList.size();
    }
}
STEP 5: Create List and Set Adapter
public class MainActivity extends AppCompatActivity {

    private RecyclerView recyclerView;

    @Override
    protected void onCreate(Bundle savedInstanceState) {
        super.onCreate(savedInstanceState);
        setContentView(R.layout.activity_main);

        recyclerView = findViewById(R.id.recyclerView);

        LinearLayoutManager layoutManager = new LinearLayoutManager(this);
        layoutManager.setOrientation(LinearLayoutManager.VERTICAL);
        recyclerView.setLayoutManager(layoutManager);

//STEP 5: Create List and Set Adapter

        List<ModelClass> modelClassList = new ArrayList<>();
        modelClassList.add(new ModelClass(R.drawable.ic_launcher_background, "This is Title 1", "This is Title User 1"));
        modelClassList.add(new ModelClass(R.drawable.ic_launcher_background, "This is Title 2", "This is Title User 2"));
        modelClassList.add(new ModelClass(R.drawable.ic_launcher_background, "This is Title 3", "This is Title User 3"));
        modelClassList.add(new ModelClass(R.drawable.ic_launcher_background, "This is Title 4", "This is Title User 4"));
        modelClassList.add(new ModelClass(R.drawable.ic_launcher_background, "This is Title 5", "This is Title User 5"));
        modelClassList.add(new ModelClass(R.drawable.ic_launcher_background, "This is Title 6", "This is Title User 6"));
        modelClassList.add(new ModelClass(R.drawable.ic_launcher_background, "This is Title 7", "This is Title User 7"));
        modelClassList.add(new ModelClass(R.drawable.ic_launcher_background, "This is Title 8", "This is Title User 8"));
        modelClassList.add(new ModelClass(R.drawable.ic_launcher_background, "This is Title 9", "This is Title User 9"));
        modelClassList.add(new ModelClass(R.drawable.ic_launcher_background, "This is Title 10", "This is Title User 10"));

        Adapter adapter = new Adapter(modelClassList);
        recyclerView.setAdapter(adapter);

        adapter.notifyDataSetChanged();


    }
}
Watch this full video tutorial on how to use Android recyclerview in your android studio application in 5 simple steps:
Learn more about android programming with my youtube videos on android projects tutorial.