Today we will learn how to get Instagram account details in Python programming. Also, we will create a GUI Tkinter design that takes input as an Instagram profile ID and fetch the details with the help of JSON requests.
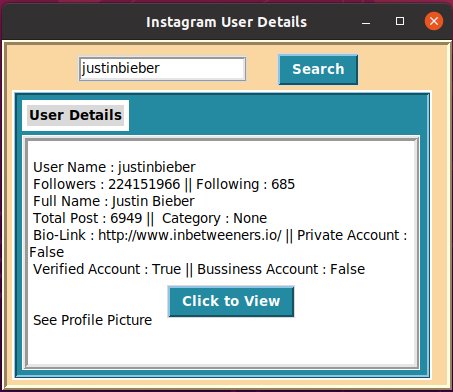
So in this application, we will try to get the user name, full name, followers count, the following count, bio-link, account type whether it is a business or private account, category, and profile pic display.
Python Tkinter GUI App Design
Let’s get started first with GUI Tkinter design and then we will write the function for getting profile information and display image.
First, you need to install Tkinter to create a GUI application, you can use the below command from the terminal (Windows, Mac, Linux):
pip install tk or sudo apt-get install python3-tk
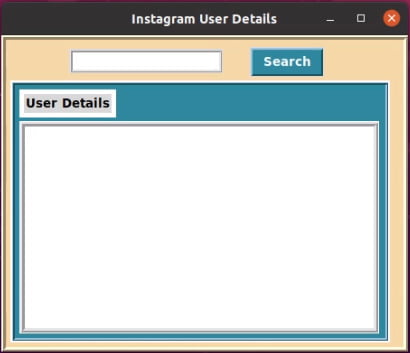
Now write the code to create a GUI like the below image, however, you can design as per your requirement because I have just created a simple GUI for learning purposes, but you can add more features.

Now you can use the full source code below with implementation:
from tkinter import *
import tkinter as tk
import requests

root = tk.Tk()
root.title("Instagram User Information")
root.geometry('450x350')

def searchProfile():
    user_name = user.get()
    url = f"https://www.instagram.com/{user_name}/?_a=1"
    data = requests.get(url).json()
    print(data)

    def profilePic():
        import webbrowser
        user_pic = data['graphql']['user']['profile_pic_url']
        webbrowser.open(user_pic)

    if details.get(1.0, END) != "":
        details.delete(1.0, END)
        details.insert(1.0, f"\n User Name : {data['graphql']['user']['username']} \n Followers : {['graphql']['user']['edge_followed_by']['count']} || Following : {data['graphql']['user']['edge_follow']['count']} \n Full Name : {data['graphql']['user']['full_name']} \n Total Post : {data['graphql']['user']['edge_owner_to_timeline_media']['count']} || Category : {data['graphql']['user']['category_enum']} \n Bio-Link : {data['graphql']['user']['external_url']} || Private Account : {data['graphql']['user']['is_private']} \n Verified Account : {data['graphql']['user']['is_verified']} || Bussiness Account : {data['graphql']['user']['is_bussiness_account']} \n \n \n See Profile Picture")

        Button(frame2, text="Click to View", relief=RAISED, borderwidth=2, font=('verdana', 10, 'bold'), bg='#248aa2', fg="white", command=profilePic).place(x=150, y=190)

frame1 = Frame(root, width=450, height=350, relief=RIDGE, borderwidth=5, bg='#FAD7A0')
frame1.place(x=0, y=0)

user = Entry(frame1, width=20, relief=RIDGE, borderwidth=3, font=('verdana', 10))
user.place(x=70, y=10)

search = Button(frame1, text="Search", relief=RAISED, borderwidth=2, font=('verdana', 10, 'bold'), bg='#248aa2', fg="white", command=searchProfile)
search.place(x=270, y=8)

frame2 = LabelFrame(frame1, width=420, height=290, relief=RIDGE, borderwidth=3, bg='#248aa2', highlightcolor="white", highlightbackground="white", highlightthickness=2)
frame2.place(x=5, y=45)

label = Label(frame2, text="User Details", highlightbackground="white", highlightcolor="white", highlightthickness=5, font=('verdana', 10, 'bold'))
label.place(x=5, y=5)

details = Text(frame2, height=13, width=48, relief=RIDGE, borderwidth=5, highlightbackground="white", highlightcolor="white", font=('verdana', 10, ''))
details.place(x=5, y=40)

root.mainloop()
Final Output – Instagram account details in python
Once you run the above code, you will get the output like below:

Now, once you click on the button “Click to View”, it will show you the Instagram account profile picture on the web browser.
I hope you like this example, you can try it out yourself and make changes according to your project need. Check our interesting python exercises that you can use for practice.
